Gluten Free Victoria Sponge

Gluten Free Victoria Sponge Ingredients Photo 20-03-2015 16 56 08

  • 225g Gluten Free Self Raising Flour
  • 225g Sugar
  • 225g Butter ( Not margarine!!)
  • 4 Large Beaten Eggs
  • 1/2 Bicarbonate of Soda
  • Strawberry Jam I have no idea how much jam I use. I just kind of do it by eye so you’ll have to do the same!

Butter Cream Ingredients

  • 85g Softened Butter ( Just leave it out the fridge for  hour to soften it)
  • 225g Icing sugar
  • 1 Teaspoon Vanilla Essence
  • 1 Tablespoon of Milk

Most shop brought gluten free cakes are a little lack luster in both the taste and texture department. This is not the case if you are willing to put the extra effort and bake one yourself using this recipe. You wont be able to tell the difference between this and a ‘normal’ Victoria Sponge, both the taste and texture are spot on with this recip

Making a simple sponge is about as easy as it gets. But baking is a pretty exact science so do follow the recipe carefully.

  1. Start by pre heating that oven to 180°C/gas mark 4. Then cream the butter and sugar together in a large mixing bowl until the mixture is light and fluffy. Add the beaten egg a little as a time, beating the mixture as you go. (Make sure your beating it not just giving it a stir!)

  2. Once you’ve beating the egg into the mix add the bicarbonate of soda. Then slowly add the flour mixing it as you go ( Don’t beat it now you’ve beaten it enough, Its time for a gentle mix at this point)

  3. Once all the flour has been added  into the mixture. Pop it into two 8″ round cake tins and stick it in your preheated for 25 to 20 minutes.

  4. Now for the butter cream, again super easy but unbelievably tasty! Start….. and finish by creaming the icing sugar, butter, milk and vanilla essence together in a mixing bowl (Using electric whisk a will speed things up a bit)

  5.  All that’s left now is to remove your cakes from the oven, spread the butter cream and jam on them, and sandwich them together then dust with icing sugar. P.s……. Do let the cakes cool down before you spread the butter cream icing them otherwise icing melts!

Enjoy!

Bacon & Gruyère Cheese Quiche

Bacon & Gruyère Cheese Quiche Ingredients Photo 20-02-2015 18 54 54

  • 180g Smoked Thick Cut Bacon (Remove the rind and slice into little strips)
  • 1 Chopped Onion
  • 130g Grated Gruyère Cheese (You can use a strong cheddar cheese if you haven’t got Gruyère cheese)
  • 180ml Fresh Double Cream
  • 70ml Fresh Milk (Full fat works best)
  • Ground Sea Salt (To Taste)
  • Ground Black Pepper(To Taste)
  • 2 Large Free Range Eggs

For The Pastry

  • 175g Plain Flour
  • 85g Salted Butter (Dont use margarine is horrid stuff!)
  • 3 Tablespoons Cold Water
  • A Pinch of Sea Salt
  • 1 Medium Free Range Egg

For Gluten Free Pastry

  • 225g Gluten Free Plain Flour
  • 1 Medium Free Range Egg
  • 1/2 Teaspoon of Xanthum Gum
  • 110g Salted Butter (Cut into cubes)
  • A Pinch of Gluten Free Baking Powder
  • 1 Tablespoon of Cold Water
  • A Pinch of Sea Salt

This ones a firm favourite of mine and in my opinion one of the most under rated food of all time. I think unfortunately, kids party’s and Iceland has ruined quiche for the masses. You’ll never see it on the menu in a restaurant or pub. If you do see it will more than likely be some awful microwaved thing that closer resembles scrambled egg on a piece of wet cardboard but I assure you a good homemade quiche is utterly divine!

The gluten free pastry uses a slightly different method so ill explain how to make that here: (Skip this section if you making ‘normal’ pastry.

  1. Start by putting the flour, xanthum gum, a pinch of baking power, butter and salt into a large mixing bowl. Then begin to rub the ingredients together with your fingertips until the mixture somewhat resembles bread crumbs (If your a lazy bum like me use a food processor)

  2. Now add the egg and the cold water then mix it well. The amount of water you add may vary so keep an eye on the texture of the pastry to make sure its not to soft or to firm.

  3. Once your happy your pastry is ready to roll! I advise you roll your pastry between two sheets of cling film it make it so much easier to handle as gluten free pastry an be fairly delicate. If your not going to use cling film roll it onto a lightly flour surface.

For the ‘normal’ pastry.

  1. Before we start the Just Roll pre-made pastry is actually really good. So you can skip this step and just use that if you want. Ill give you a guilt free pass, i think you can just about still claim your quiche to be homemade as well! But for the purists among you, start by placing the flour, butter, egg and salt into a large mixing bowl.Then begin to rub the ingredients together between your thumb and fore finger until the mixture somewhat resembles  bread crumbs (If your a lazy bum like me use a food processor)

  2. Then add the water to bring the pastry together into a ball the pastry can no be rolled.  I advise you roll your pastry between to sheet of cling film it make it so much easier to handle as gluten free pastry an be fairly delicate. If your not going to use cling film roll it onto a lightly flour surface.

Right now your well versed in the art of pastry making its time to assemble the quiche.

  1. Start by evenly rolling out the pastry between two sheets on cling film (Remember to remove the cling film before you put it in the oven!) or on a lightly floured surface then use the dough to line a loose bottomed fluted flan tin. (Don’t worry if you have pastry hanging over the edge of the tin you can trim that off later) Then pop it into the fridge for 30 minutes and preheat your oven to 220°C/gas mark 7.

  2. Now you’ll need to blind bake the pastry do this by pricking it all over using a folk, this will prevent air bubble from forming in the pastry. Then line the base and sides of the pastry case with baking parchment and fill the case with baking beans. Then place it on a baking tray and pop it in the oven for 20 minutes. After the first ten minutes take it out the oven to remove the baking beans and baking parchment. Then back in the oven for the remaining ten minutes. The pastry should be golden brown once cooked, if its still a bit pale leave it in there for a few more minutes. Once cooked trim the overhanging pastry.

  3. Almost there ,turn down the oven to 180°C/gas mark 4. Fry the bacon strips until crispy  on a medium heat this will take about ten minutes. Once cooked place the bacon into the pastry case. Using the same frying pan so’s not to waste those lovely bacon juices fry the onion until golden brown this will take around 8 minutes. Then pop them into the pastry case with the bacon and top it all of with the cheese.

  4. Next beat the eggs, milk and cream together seasoning it with salt and pepper as you go. Now pour the beaten mixture into the pastry case with the bacon onions and cheese.

  5. Now place the quiche back into the oven for a further 25 to 30 minutes to cook the quiche until its just about set. Do be careful not to over cook it, the eggs pretty much turn into rubber if you do. That’s it, now dress it up with a fancy pants salad and enjoy.

Tip note: You can really put whatever you want in the quiche the recipe remains the same you may have to adjust the cooking times a little but its a pretty versatile dish in that respect.

Avocado Coconut & Lime Mousse

Avocado Coconut & Lime Mousse Ingredients Photo 31-01-2015 16 58 12

  • One Ripe Avocado
  • Strawberries
  • Blueberries
  • Half a Lime
  • 1 1/2 Tea Spoons Coconut Oil (The girls used almond milk but i didn’t have any so i used coconut oil)
  • 2 to 4 Table Spoons of Natural Yogurt
  • 1 or 2 Teaspoons of Organic Honey

Massive thanks to the girls at Cosofoodie for this recipe, it really is delicious. For more great recipes and foodie pictures check them out. They are two girls who live in Germany/Finland, that love traveling the world and exploring delicious new cosmopolitan dishes along the way.

Insta – Cosmofoodie

Tumblr – Cosmofoodie.tumblr.com

  1. This is one is so easy there’s barely a need for a recipe but still…. Start by mushing up the avocado with the coconut oil, natural yogurt and honey. I used my Nutri Bullet instead of mushing it makes things a little creamer, so if you don’t mind the extra washing up use a Nutri Bullet or food processor (Depending on how sweet you want it play around with amount of honey/yogurt you add)

  2. Once you’ve got a green paste stir in the juice from half a lime to sharpen the taste up a bit. Then arrange the mousse, blueberries and strawberries nicely in a fancy pants glass or bowl use a little lime zest to garnish and your done!

Don’t Forget to comment and let me know what you think.

Curried Parsnip Soup with Truffle Croutons

Curried Parsnip Soup IngredientsPhoto 25-01-2015 14 58 11

  • 120ml Double Cream
  • 2 Chopped Onions
  • 3 Pressed Garlic Cloves
  • 2 Table Spoons of Butter
  • 6 Chopped Parsnips
  • 1.5 Liters of Vegetable Stock (If your not a veggie you can use chicken stock)
  • 4 to 6 Teaspoons of Curry Powder (I used madras curry powder  any curry powder will work)
  • Salt to Taste
  • 1/2 Thick Slice of Bread
  • Truffle Oil (You can use olive oil)
  • Chopped Coriander (To garnish)

I don’t really eat soup, for one reason or another i don’t feel like I’ve eaten unless I’m chewing on something. But its a good quick winter meal and keeps well in the freezer  so from time to time ill make it.

  1. Start by sautéing the pressed garlic and chopped onions with the butter in a large saucepan or wok. Once the onions have softened add the chopped parsnips and sautée for a further 2 or 3 minutes. After that add the stock and the curry powder then simmer for 20 minutes.

  2. Whilst that’s simmering get to work on the croutons. Chop your bread into little crouton squares, pop squares into a small frying pan on a medium heat with a glug of truffle oil and a pitch of salt. Fry the croutons for about 5 minutes giving them a little flick every now and again so they toast evenly. Once cooked put them to one side and get back to the soup.

  3. Once you’ve simmered the parsnips and all the rest of it for 20 minutes pop it in the blender and whizz it all up. Finally stir in the cream, pour into a bowl, then jazz it up with the croutons and coriander.

Its as simple as that…. Enjoy!

Tip Note: You can may want to play around with amount of curry powder and cream depending on how spicy you like it. You can easily add a little more curry powder or cream once its all cooked.


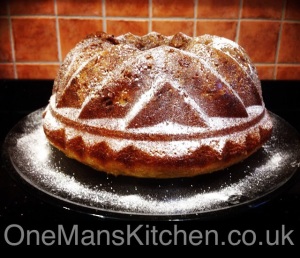
Walnut & Rum Bundt Cake

Walnut & Rum Bundt Cake IngredientsPhoto 23-01-2015 20 46 03 (1)

  • 120g Chopped Walnuts (You can use pecans)
  • 1 Teaspoon Organic Pure Vanilla Extract
  • 245g Plain Flour (Use self raising if your making it  Gluten free)
  • 250g Granulated Sugar
  • 1 1/2 Teaspoons of Baking Power
  • 25g Corn Flour
  • 70g Ground Almonds
  • 1 Teaspoon of Salt
  • 110g Sunflower Oil
  • 3 Tablespoons of Captain Morgan Black Label Dark Rum
  • 4 Large Eggs (Room temperature)
  • 1/2 Baking Soda
  • 125ml Milk
  •  Fairtrade Icing Sugar (Used for dusting the cake)
  • Bundt Tin ( Its basically just a doughnut shapes cake tin)

Rum Glaze Ingredients

  • 110g Unsalted Butter ( To be honest youll get away with salted butter)
  • 3 Table Spoons Water
  • 150g Sugar
  • A Pinch of Salt
  • 6 Table Spoons of Rum

This ones a little more complex then most of my other recipes. But its still not beyond the reach of you folks that are new to baking. It looks every bit as good as it taste so it well worth the extra effort. If your making the gluten free version it works just as well as the ‘normal’ recipe. Sometimes the texture is a little off with gluten free cakes, but this recipe even the texture is spot on!

  1. As always first thing firsts preheat the oven  (Gas Mark 3/170°C) and grease the Bundt Tin. Then place the chopped walnuts, 25 grams of sugar and the vanilla essence into a bowl. Give it a little mix then spread it evenly around the bottom of your greased Bundt Tin.

  2. Now its time for the cake mix. In a large mixing bowl place the remainder of the sugar and all of the other cakes dry ingredients, mix it all up and make a well in the center. Now one at a time add the sunflower oil, rum, milk and eggs. (Whisk the mixture up after each addition so add the sunflower oil, then whisk, add the rum then whisk and so on…..) Once you’ve added all the wet ingredients the mixture should be pourable more like a batter mix rather then a normal cake mix.

  3. Pour the mix into the Bundt Tin and give the tin a little wiggle to ensure the mixture is spread evenly throughout the tin. Then pop it in the center of the preheated oven for between 40 or 45 minutes. ( Make sure you don’t over bake the cake as the bottom of the cake will burn super easily. Use a cake tester to prod the cake if the tester comes out clean or with a few wet crumbs on it, its done. If you don’t have  cake tester get one they are soo handy. You can pick them up for like 50 pence from here)

  4. Once the cake is cooked take it out the oven and leave it to cool in the Bundt Tin for 10 minutes. While the cake is cooling you can get to work of the rum glaze. Its really easy, place all the ingredients for the glaze apart from the rum into a small saucepan and put on a medium heat. Bring the glaze to the boil stirring it pretty much continuously throughout the cooking process.

  5. Once the glaze has started to boil take it off the heat and add the rum. Then simmer the glaze on a medium to low heat for about 5 more minutes to reduce the glaze. At this point the glaze should be gently simmering not boiling!

  6. After the glaze has reduced pour the hot glaze over the cake while the cake is still in the Bundt Tin and then leave it to soak into the cake for around ten minutes. (You can make little holes in cake with your cake tester or a knife so the glaze seeps in a little quicker)

  7. Now careful remove the cake from the Bundt tin, dust it  with icing sugar to make it look pretty and your golden its ready to eat!

Thanks for reading!

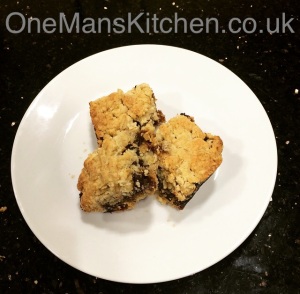
Date Slice

Date Slice IngredientsPhoto 16-01-2015 17 14 03

  • 450g Pitted Dates
  • 225g Rolled Oats(Gluten free can be used most good quality oats are gluten free anyway)
  • 225g Self Raising Flour (Gluten free can be used)
  • 225g Butter (Don’t use margarine, in fact don’t ever use margarine. Totally remove it from your life its crap find another way to reduce you cholesterol!)
  • 55g Sugar

A personal favorite of mine and so easy to make! Date slice is a great little energy boosting, sweet snack especially if you trying to avoid chocolate etc. But in my opinion best eaten accompanied by a good cup of coffee……. And guess what it taste exactly the same if you make them gluten free, so its also a great one for all you coeliacs out there.

  1. First things first preheat that oven!(Gas mark 5/190°C) Next Simmer the dates on a low heat in 280ml (1/2 pint) of water. Simmer until the dates have softened and all the water has evaporated away. You should be left with a date paste type arrangement.Then put your dates to one side so you can start work on the oat mix.

  2. Now pop all your dry ingredients into a mixing bowl and give it a little mix. Then melt Your butter in a saucepan. (If your feeling particularly lazy show the butter a little radiation. Be careful not to burn the butter though just zap it for 10 to 15 second at a time until all the butter has melted)

  3. Add the melted butter to your dry ingredients then mix it all up. Now line a medium sized banking tray with Baking Parchment and press half the oat mix firmly into the baking tray.(Do make sure you use a fairly deep baking tray) Then spread the cooked dates over the oat mix.

  4. Almost there, you just need to sprinkle the remainder of the oat mix on the top and press it in gently. Then pop it in the oven for 30 minutes on gas mark 5/190°C and your done!

Please let me know what you think.

Garlic & Coriander Prawns with Courgette Spaghetti

Garlic & Coriander Prawn with Courgette SpaghettiPhoto 09-01-2015 20 40 06

  • One Medium Courgette
  • 10 Fresh King Prawns
  • 4 Cherry Tomatoes
  • A Handful Fresh Coriander
  • One Clove of Garlic ( I love garlic so use two)
  • Salt & Pepper

This is my first go at courgette spaghetti or courgetti as some people call it. I came across it last week and thought I’d give it a whirl. This fantastically simple dish is what I came up with. If your looking for a low carb super healthy meal that’s going to fill your belly then this ones for you!

  1. Start by peeling your courgette with a Julienne Peeler if you don’t have I advise you get one there great for slicing veg in a bit of a fancy pants way with next to no effort. (I recommend the OXO Good Grips Julienne Peeler hyper linked above. Like all OXO products its great quality and not to fiderly for my big man hands to operate.) If you don’t have a Julienne Peeler use a standard peeler to slice the courgette into thin slices and then use a knife to cut it into thin spaghetti strips.

  2. Put your courgette spaghetti to one side and start work on your prawns. Place your prawns into a bowl along with some finely chopped coriander and a pressed garlic clove. (Again if you don’t have a garlic press I’d advise you get it one massive time saver as you don’t even have to peel the garlic clove before you press it!  I recommend the OXO Good Grips Garlic Press it has a built-in cleaner which again saves time) Now give it all a mix and add a little olive oil and season to taste. ( If you want to make thing a little more exciting add fresh chilli as this point, I did.)

  3. Pop your prawns into a hot frying pan with a little olive oil on a medium to high heat for 3 to 4 minutes (If your cooking the prawns from frozen cook them for a extra 2 minutes or so) Remove the prawns from the heat to flick them around a bit 3 or 4 times during the cooking process so the garlic doesn’t burn! You’ll need to start cooking the courgette spaghetti now as well. Pop it into a sauce pan of boiling water with a touch of salt for 2 or 3 minutes.(Some people prefer  the courgette spaghetti uncooked I’ve never tried it but apparently its just as tasty)

  4. Once its all cooked and plated up. Chop your cherry tomatoes into halves. Fry only the flat side of the tomato halves in a hot frying pan for 1 or 2 minutes and use them to garnish. Once you’ve made it look all pretty your good to go….. enjoy!

Continue reading

Cod & Basil Stuffed Peppers

Cod & Basil Stuffed Peppers IngredientsPhoto 14-11-2014 20 30 55

  • 2 Cloves of Garlic (I always used smoked garlic and  I also quite like garlic you may only want to use one clove as well )
  • 1 Large Fresh Fillet of Cod  (You’ll need around 200g do worry if your a little over or under)
  • Small Hand Full of Pine Nuts
  • 3 Medium Mushrooms
  • 2 Shallots (A Small Onion would be fine)
  • Hand full of Fresh Basil
  • 3 Halves Of Pepper
  • A Splash of Olive Oil
  • Salt and Pepper
  • Lambs Lettuce (This is for greenery you can see in the middle)

This is my go to meal, if I need a good tasty, low carb nutritious meal. Its really easy to make and there’s not an empty calorie in sight! It’s also a good one for cooking on mass for BBQ’s and things as they are just a yummy cold. The recipe can also be messed around with quite a lot you can add things like rice, cheese or chilli’s  to the recipe to liven things up a bit. I also find it a great way to use up all those suspect about to go mouldy vegetables that are in everyone’s fridge.

  1. Firstly gut your peppers remove all the seeds and white membrane. Wash the peppers under a tap to get rid of any hard to reach seeds.

  2. Now if you don’t want to get all chefy just soften the peppers by sticking them in the microwave for 3 or 4 minutes, and skip this little bit because we are going to start by charring the peppers. This can be done either with a Cook’s Blowtorch or if you don’t have a blow torch you can just char them over the naked flame on your gas cooker. (I prefer to use the Cook’s Blowtorch method because I’m a man and burning stuff with a little Blowtorch is fun!)

  3. As much as burning things is fun you don’t to totally incinerate them. Just char them until the pepper begins to soften and theres a few burnt patches on the skin of the pepper. Once this is done put the peppers to one side and preheat your oven to 180c or gas mark 6.

  4.  Now for the stuffing. Finely chop your garlic and fry off the cod with the garlic and a splash of olive oil in a frying pan on a medium heat. When the cod starts to cook, begin to break it up into flakes in the frying pan. It won’t take long to cook. But while its cooking chop the mushrooms into small pieces and finely chop the shallots add them both to the frying pan. Then salt and pepper to taste.(I normally add a few chilli flakes as well at this point)

  5. Continue to cook on a medium heat until the mushrooms and shallots have softened this should happen after 3 or 4 minutes. Now its time to add your pine nuts and cook for another few minutes. You can either roughly chop your basil and add it with your pine nuts or you can line the inside of your peppers with the basil leaves. (I prefer to add them with the pine nuts)

  6. Now stuff your peppers  and pop them in the oven for a 5 or 6 minutes and thats it! (To be honest if I actually prefer my pepper to still have a bit of a crunch so I generally don’t even put them in the oven)

  7. Plate it up add your lambs lettuce as a garnish and enjoy!

Tip Note: You can use any meaty fish doesn’t have to be cod. I’ve made this dish with Skate, Kippers and even prawns all work perfectly but as i said play around with stuffing a bit a let me know how you get on!

Chicken Katsu Curry With Coconut Rice

Chicken Katsu Curry Sauce Ingredients kat curry

  • 2 Medium Onions
  • 5 Garlic Cloves
  • 2 Medium Carrots
  • 2 Table Spoons Of Plain Flour(Gluten free can be used)
  • 4 Teaspoons Curry Powder
  • 2 Teaspoons Of Honey
  • 4 Teaspoons Of Soy Sauce (Gluten free soy sauce can be used)
  • 1 Bay Leaf
  • A Dash Of Sunflower Oil
  • 600ml Chicken Stock (I use two of the chicken stock gels)
  • 1 Teaspoon Garam Masala

Bread Chicken Ingredients

  • 4 Chicken Breasts
  • 2 Tablespoons Plain Flour (Gluten free flour can be used )
  • 100g Panko Breadcrumbs (If you don’t have breadcrumbs i’m going to explain how to make them in the recipe!)
  • 1 Egg (You can use natural yogurt this will also mean you won’t need the flour you’ll just be dipping your chicken in the yogurt and then the breadcrumbs)
  • 250ml Vegetable Oil (This is for the frying)
  • Salt & Pepper

Coconut Rice

  • 350g Basmati Rice
  • 1/2 Tin Of Coconut Milk (You can use 1 sachet of coconut cream)

This one is for all you wagamamas lovers out there its a bit more complex than most of my recipes but well worth the extra effort. Unlike most of my recipes this one makes enough for four so invite some friends round! Failing that just do one chicken breast, less rice and freeze the sauce. You can also add a side salad or veggies as I have if like me you like to hit that 5 a day target.

It’s also a great one for people avoiding gluten just swap the flour out for gluten free and use gluten free bread to make the bread crumbs its won’t change the taste of the dish at all.

  1. For the sauce roughly chop your onions and garlic cloves pop them in a saucepan with some oil on a medium heat until your onions are soft. Then roughly Chop your carrots and add them too. Cook the whole lot for around 12 minutes.While this is cooking away make your chicken stock, to your chicken stock add the honey, soy sauce and bay leaf.

  2. Now add your flour and curry powder to the saucepan and cook for another minute. Gradually add your chicken stock into the mix. Then bring to a simmer and cook until the sauce thickens this will take around 20 minutes.

  3. Almost there just….. Stir in the garam masala, cook for a further a minute. Then pour the curry sauce through a strainer to remove the chucks of onion, carrots and garlic.(That’s the sauce done. Now its time for chicken, you can leave the curry sauce to go cold whilst you cook the chicken and rice just reheat the sauce before serving.)

  4. If you don’t want to make your bread crumbs you can skip this step. Breadcrumbs are really simple for panko breadcrumbs cut the crusts off a slice of bread. (For normal bread crumbs you don’t want to be cutting the crusts off) Then bake the slice of bread at 150c/gas mark 2 for 10 to 15 minutes. Turn the slice bread about halfway through to cook the bread evenly. Then just blend it up in food processor and you’ll have bread crumbs!

  5. The chicken is dead easy. Firstly  set out three bowls with your beaten egg, flour and breadcrumbs in. (You can use natural yogurt instead of an egg) Now use a meat hammer to flatten your chicken until its 1cm thick. Then season both sides of your chicken to taste with salt and pepper.

  6. Coat the seasoned chicken breasts in flour then egg and then breadcrumbs making sure to coat both sides of the chicken breast.( This can get a little messy so having a sink full of water at the ready to wash your hands is a good idea!)

  7. Once the chicken is coated leave it and start your rice. keeping in mind your chicken is going to take 4 or 5 minutes to cook until golden brown on each side. So your going to have to multitask or recruit a willing volunteer for this next little bit.

  8. Put your rice into a medium sized pan with 500ml of water and bring to the boil. Once boiling pop a lid on the pan and turn the heat right down so the rice is just simmering away (Don’t be tempted to stir, poke at or lift the lid on your rice whilst its cooking. I have no idea why but my mother always used to tell me off when I did any of the above so you can’t either!) Leave simmering away for 10 or 12 minutes.(See No10 so you can cook your chicken whilst the rice is cooking)

  9. Once your rice is cooked remove the lid. Fluff the surface a little with a folk, then add the coconut water and cook on a super low heat not forgetting to replace the lid for a further 3 to 4 minutes. Then press the rice into little bowls or ramekins and leave it to cool for 3 minutes so it looks all pretty when you serve it.

  10. Heat your oil in a large frying pan over a medium to high heat. Then place the chicken breast into the hot oil and cook for around 4 minutes on each side until golden brown. But make sure the chicken is cooked through slightly raw chicken is not cool! (You can also cook your chicken in the oven for 20 minutes at 180C/gas mark 4)

Tip Note: The chicken can be subbed out for a meaty fish like cod or for the veggies out there you can replace the chicken with a beef mushroom or aubergine.

Enjoy!

Don’t forget to let me know what you think.

Posh Scrambled Egg

Posh Scrambled Egg IngredientsPhoto 29-10-2014 21 00 58

  • 3 Large Eggs (Free range are best)
  • 4 Medium Size Button Mushrooms
  • 2 Shallots (Onions work fine)
  • 4 Cherry  Tomatoes
  • Some Chopped Chives
  • A Dash Of Milk
  • 1 Tea Spoon Of Melted  Butter
  • Salt
  • Black Pepper
  • Truffle Oil (Olive oil is fine)

You May Also Want To Add

  • Chilli Flakes
  • Mustard

Its tastes amazing, looks great on the plate and its super quick! It’s also monstrously easy to cook, so if some how you manage to mess it up you need to sit in a dark room and take a long hard look at yourself!

  1. Start by beating the eggs in a small bowl or measuring jug. Then add about the same amount of milk as you’d put in a cup of tea to the beaten eggs.

  2.  Now for the butter, melt your butter in the frying pan your going to use to cook the mushrooms, shallots and tomatoes. Once the butter has melted pour it into the egg and milk mixture add salt to taste. ( If you plan on adding mustard or chilli flakes do this now)

  3. Next cut your mushrooms into quarters, your tomatoes into halves and finely chop your shallots. Add the mushrooms and shallots to a hot frying pan with a splash of truffle oil. At this point you may want add a little salt or pepper. Cook for a few minutes before getting the tomatoes involved. (try not to poke at the tomatoes too much whilst they are frying as they’ll turn into a tomato slop if you do)

  4. Leave your mushrooms, shallots and tomatoes frying away whilst you cook your scrambled egg. Pour your beaten egg mix into a small pan/frying pan. Cook on a gentle heat folding and breaking the egg every 20 seconds. I suggest you use a wooden spoon to do this . ( You may need to give your egg mixture a quick whisk before pouring it into the pan….. Its been sitting arround a while so has probably separated a little)

  5. Repeat the process until the eggs are cooked but still runny in places, then pop the scrambled egg on a plate.( the egg will continue to cook on the plate which is why the egg need to still be runny in places)

  6. By this time the mushrooms shallots and tomatoes should be cooked. From here all you need to do is spoon them on top of your scrambles egg and garnish with your fresh chopped chives.

Tip Note: Prawns or salmon can be added to this recipe to beef it out a bit if your feeling particularly hungry.